Procedural building generation
- by Michu San

Procedural generation is a method that lets you make an object of any length, width, and height. Objects created that way can have repeatable parts or are as whole repeatable. It can be used to generate levels, buildings, landscapes, roads, and more.
Why use procedural generation?
Procedural generation helps to create objects that are matchable to each other and are constructed from a few parts. The number of parts can be adjusted and the object will change accordingly. The biggest advantage of using procedural generation is that there are fewer draw calls therefore it is less performance-consuming and often is used for optimization.
How to use it?
To make a procedural building generator we will use a Construction Script inside the blueprint, we will add variables for the number of parts that can be adjusted and finally the logic that will allow us to construct objects in the way we want. Variables can be changed in the editor and the object on a level will reflect that.
In this example, we will use a corner and two different wall meshes.
The walls have the same length, otherwise it would be difficult to match them correctly.
The example corner and walls are from the City Sample project that was used to create the Matrix Awakens demo provided by Epic Games: https://www.unrealengine.com/marketplace/en-US/product/city-sample .
You can check our demo on GitHub.
1. Create a blueprint with Instanced Static Mesh.
Add the components you want to use an Instanced Static Mesh (Pic 1.) and set Static Mesh (Pic 2.). In this example we have 3 parts of the building: Corner, Wall, Wall2.


2. Add basic logic in the Construction Script.
For easier preview we will use the Construction Script, so we can see changes while we are adjusting variables in the editor, not needing to even hit the Play button. For other purposes, I do not recommend using the Construction Script as it might lead up to crashes or affect performance when objects are being moved. Also, it should be avoided to change the properties of the actor or its child. As stated before we only use it for previewing our generated object in real time.
Create variables for the number of floors, width, and length. Make them public and expose them to instances of the blueprint. Adjusting this variable will change how the object is built.
Tip: We can restrict our width variable (Pic. 3.). Now only numbers 0 and above will be possible to set with a slider.

Now we add the first part of the building to the Construction Script: Width (Pic. 4.) in node Add Instance. We right-click at the parameter Instance Transform and choose Split Pin Struct because we want our first part (in this case wall) to be at coordinates 0,0,0.
Pic. 4. Adding a wall of the building.
Then we have to add the next parts, but we want it to be an adjustable setting. So we have to add walls in a loop and check if it reached the width we wanted (Pic. 5.). In the loop we set the start index equal to 0 and the last index to the width variable. The 0 index will be later used for a corner.
Pic. 5. Adding width procedurally.
We multiply the index by the size of the mesh (min bounds – max bounds and absolute of the result), so we can put one Instanced Static Mesh next to each other (Pic. 6.). There might be issues when pivot is not in the center or end of the mesh, otherwise this solution will work fine. If a pivot of the wall is moved, we will need to adjust it on the first and last parts of the wall by adding or subtracting the difference offset.

3. Add more advanced logic in the Construction Script.
Now to finish a building we need a corner. To make the building unique we add a second style of wall mesh (Pic. 7 and 8.). Besides that, we add a stream seed number to have control of the random pattern.
Pic. 7. Adding a corner and randomizing wall mesh to generation.
Pic. 8. Randoming wall mesh macro.
We need to create the rest of the building. To do it we expand the code from Pic. 7. and close everything in the loop with the NumberOfFloors variable(Pic. 9.). We measure the height from the bounds of the meshes and then we multiply it by index from a loop to set a mesh on the correct floor. For every other side, we need to take length instead of width. Also, we need to remember to add or subtract differences in the bounds of a corner depending on how the pivot is located on each side.
Pic. 9. The generation of one side.
4. Final result.
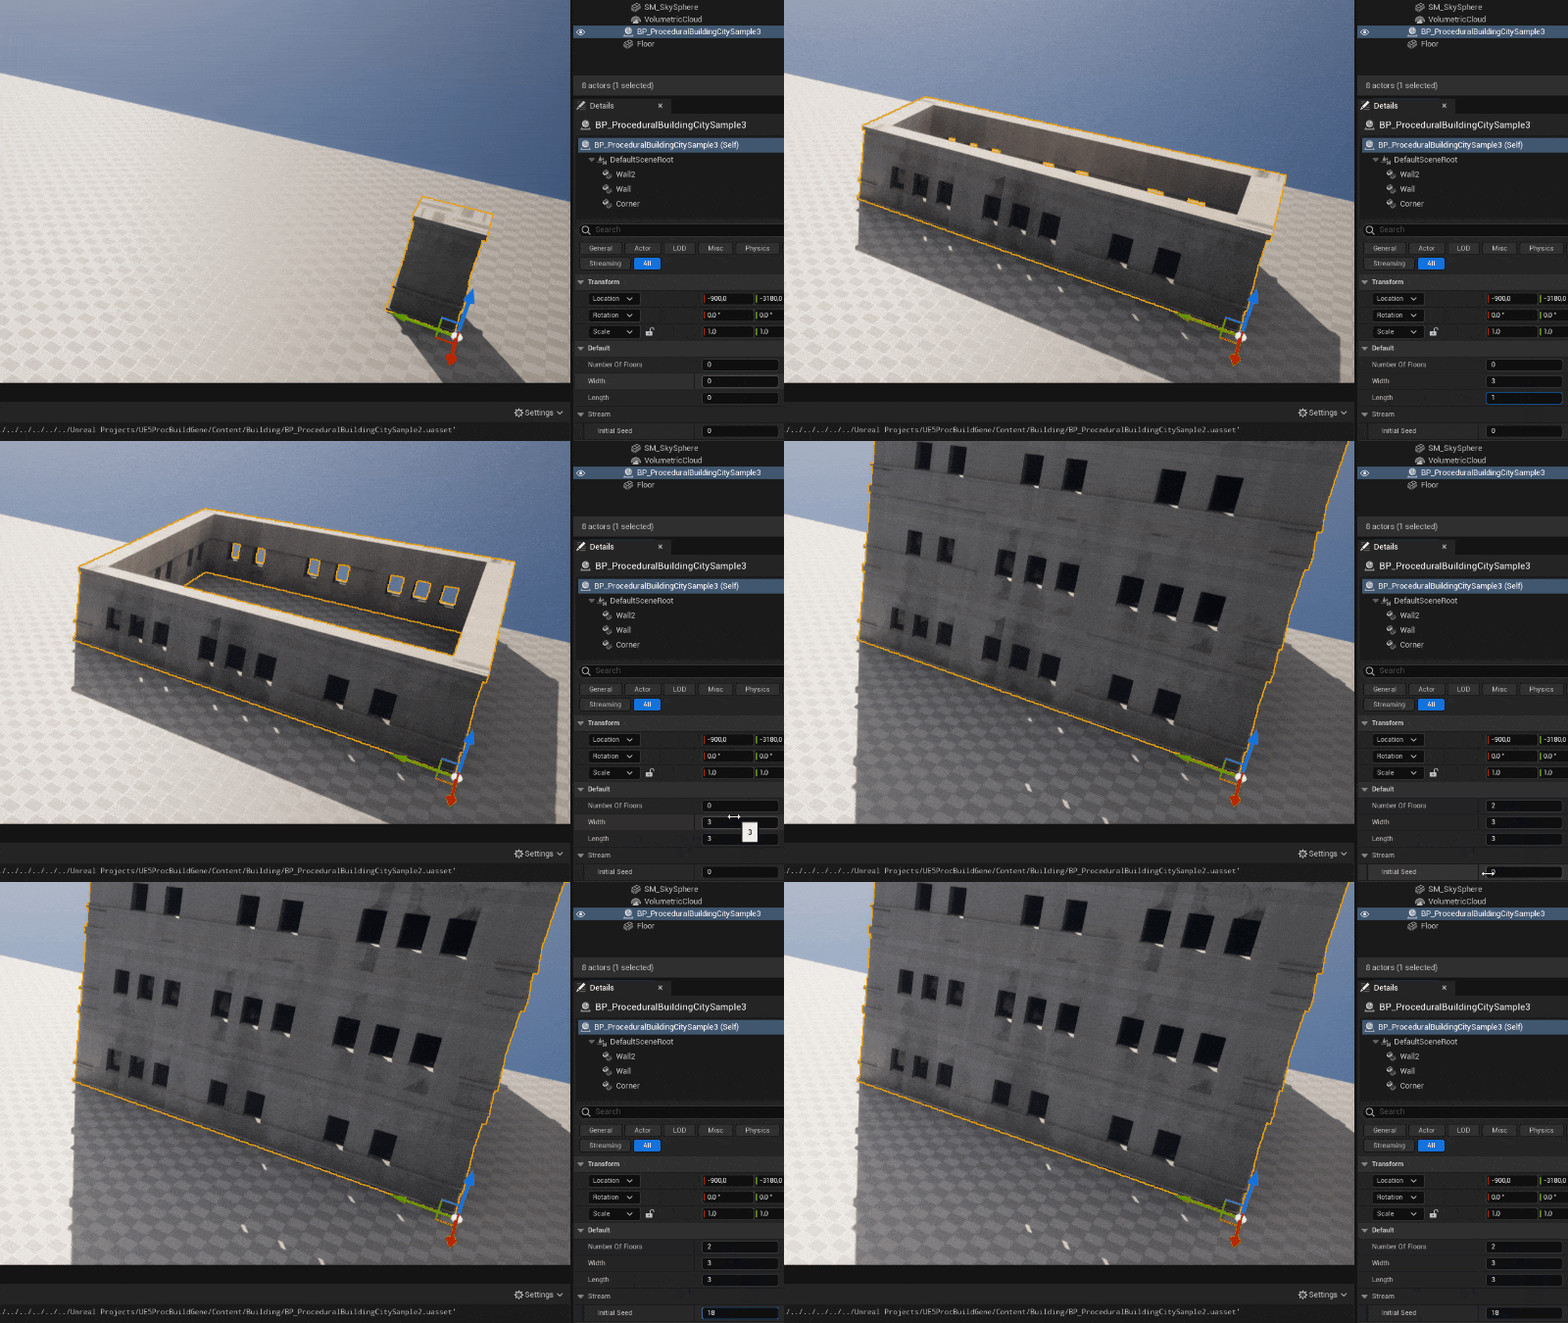
After that, the blueprint is done and can be placed in a level (Pic. 10).

In the details of the blueprint variable NumberOfFloors, Width, and Length can be adjusted and the building will change accordingly. Modifying Stream’s initial seed will variate the wall pattern.
Here is a random building generated by our Blueprint:

Enjoys programming games since 2015.
4 years of commercial experience as an Unreal Engine developer.

