
Procedural city generation
In the following post we will go through the process of creating a procedural city generator based on generated building from: Procedural Building Generation.
For easier representation, a widget is used to provide sliders and a checkbox for adjusting parameters of the city.
We will create a simplified city generator of the buildings sized 1×1, with roads not included. The generator will allow us to choose width, length, and height of the city, modify its center point (the highest buildings will be close to the center), or choose a random height for every building and configure two random seeds for height and building pattern.
You can check our demo on GitHub.
How to make it?
First of all, we need to move our code in the procedural building generator from Construction Script to BeginPlay, because we can’t spawn instances of Blueprint objects in Construction Script as our object is no longer Instanced Static Mesh, but Blueprint that includes them. To make a procedural city generator we have to create a Blueprint and add variables for the parameters that we want to be adjusted and the logic that will allow us to construct the city the way we want.
1. Create an actor Blueprint that spawns the procedural building.
Add Spawn Actor from Class node and set the class to the previously created Blueprint (in our case BP_ProceduralBuildingSample) (Pic. 1.)
Pic. 1. Spawning BP Procedural Building City Sample.
This node will allow us to spawn buildings with some parameters that we will adjust later.
Also, we need a struct like Vector2D, but with integers instead of floats, so we will use IntPoint, a struct with 2 integers.
2. Set the city size.
Add width and length parameters that set how big the city will be. Close up everything in width and length loop (Pic. 2). it will let us create buildings next to each other within set boundaries. The MaxCitySize variable will be later used to determine where the center of the city is. Some nodes are multiplied by width and length indexes to calculate the distance between buildings.
Pic. 2. Spawning buildings in a rectangular shape.
In the result city will look in Pic. 3.

3. Add a random height of the building.
Our goal is to generate the city in two patterns:
- centralized – buildings closer to the center will be higher (looks pyramid-like),
- completely random – each building has a random height.
To do it we create a macro(Pic. 4.) that allows it.
Pic. 4. Building height randomizing function.
Firstly we check for the RandomHeight bool variable that is responsible for the kind of city we want (completely random height or pyramidal). Based on that variable we calculate the height of the building either by randomizing it or by taking into consideration variables like MaxCitySize and OffsetCenter that will allow us to move the city center towards the chosen axis.
So now the final Blueprint contains a variable that holds city size, loops through it, calculates the next building height, randomizes the offset and variable from stream seed then finally spawns mesh and adds it to a buildings array (Pic. 5. ).
Pic. 5. The final blueprint.
We don’t want to generate the same number from NewBuildingStream so we need to generate a number from the stream seed. Otherwise, buildings of the same height would have the same pattern (Pic 3.).
4. A Widget for modifying parameters (optional).
For an easier preview of the city generation, I recommend creating a widget that allows changing parameters and re-generate the city. To do that we need to add every generated building to an array (last node on Pic. 5.) and then OnDestroy called from the city blueprint we also destroy buildings (Pic 6.).
Pic. 6. Removing generated buildings.
We create a simple widget (Pic. 7) that allows us to change sliders and the checkbox for parameters of the city.
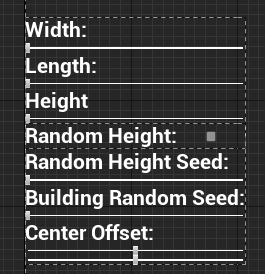
The widget Blueprint (Pic. 8.) contains all actors of the Blueprint city. We can set up all parameters for the city: width, length, height, random height, random height seed, building random seed and center offset x,y.
With the random height bool variable, we can decide how a city will be built: centralized or random height, but no higher than the value of height variable.
We can constrain slider values to 1 in the StepSize parameter since we use integers. Also, we can set MinValue and MaxValue to our personal preferences, depending on how flexible our city settings need to be.
Pic. 8. Widget’s Blueprint.
In the GenerateCity macro (Pic. 9.) we access the city object, save the previous city transform, and destroy it as we are going to spawn new with new parameters. We take the parameters from the widget. Then we store the city in the array for later use.
Pic. 9. Generate City macro.
We also need to add our widget to the viewport. It can be done in level Blueprint(Pic. 10.).
Pic. 10. Adding a widget to the viewport.
5. Final result.
Using the widget we can manipulate how the city looks by modifying the random seed of the height and building pattern and the center offset.
The random city generated by our Blueprint (Pic. 12).


Enjoys programming games since 2015.
4 years of commercial experience as an Unreal Engine developer.