A Tool for Calculating Cyclomatic Complexity in Blueprints
- by Gaida San
In this post, I’m sharing a custom tool I made for calculating Cyclomatic Complexity in Blueprints.
What is Cyclomatic Complexity?
Cyclomatic Complexity (CC) is a software metric used to measure the complexity of a program’s control flow. It was introduced back in 1976 and is used to quantify the number of linearly independent paths through a program’s source code. This helps assess the complexity and maintainability of code, often being an indicator of how difficult it might be to test or understand. It’s commonly used in static code analysis and serves as a guideline to manage the complexity and improve the overall quality of software.
How to calculate CC for BP?
The original formula can be found on the Internet as well as tools that allow you to calculate CC for C++.
What about UE Blueprints? Valentin Galea gave a speech at Unreal Fest about his custom tool, which was created exactly for this purpose. I recreated his algorithm and wrapped it in a nice plugin that you can use to check CC in your BPs in any UE project.
Here is how the algorithm works:
- In a given BP, collect all Entry Nodes (the first Node in the function, or Event Node).
- Skip Entry Nodes that are not connected to anything.
- For each Entry Node iterate through connected Nodes and count all the branches in the execution flow. Start the counter with 1 since there is always one (default) flow.
- Skip disconnected or duplicated flows.
- Sum all branches from all selected functions – that’s the CC for this BP.
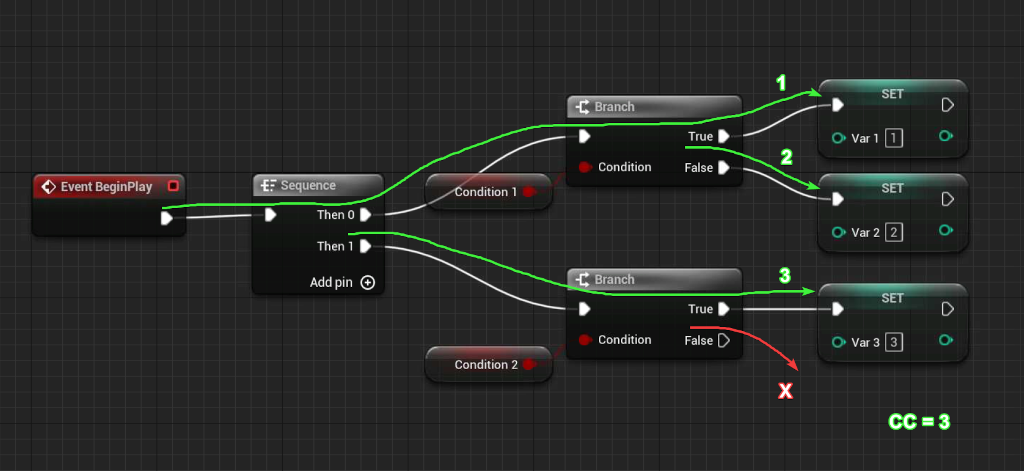
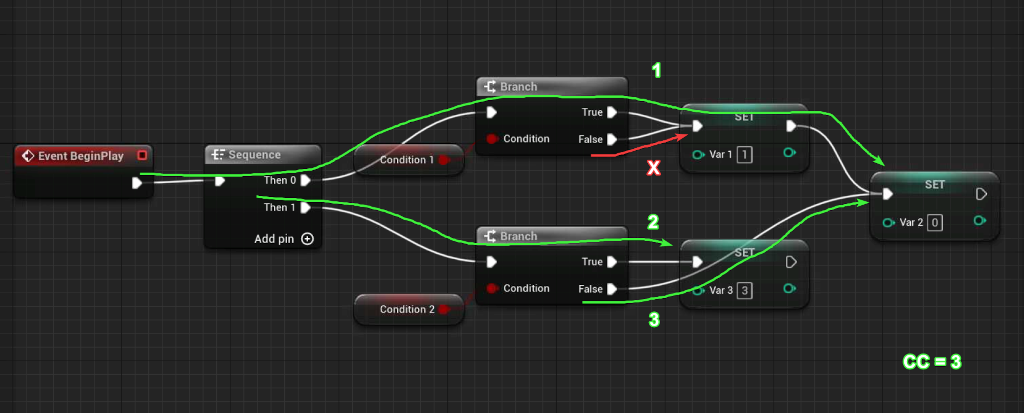
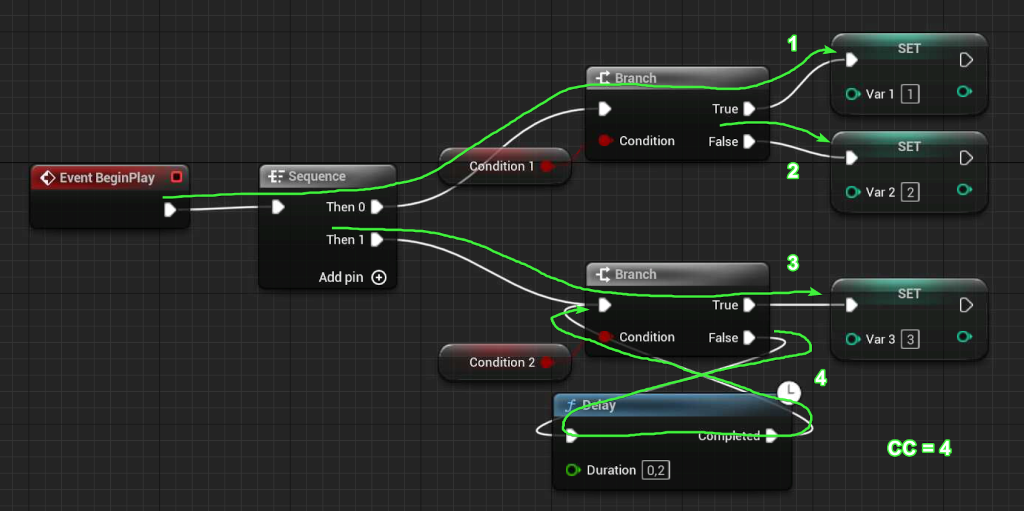
How to use the plugin?
- Download the plugin from repo.
- Add it to your project’s Plugin folder.
- Compile the code.
- Open Editor, right-click on Blueprint or the entire folder, and select “Validate Asset”. The result will be printed in Message Log -> Asset Check.
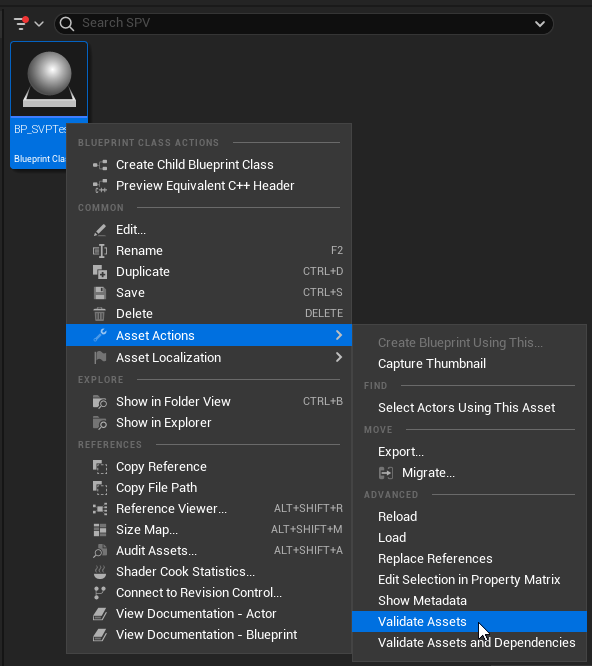
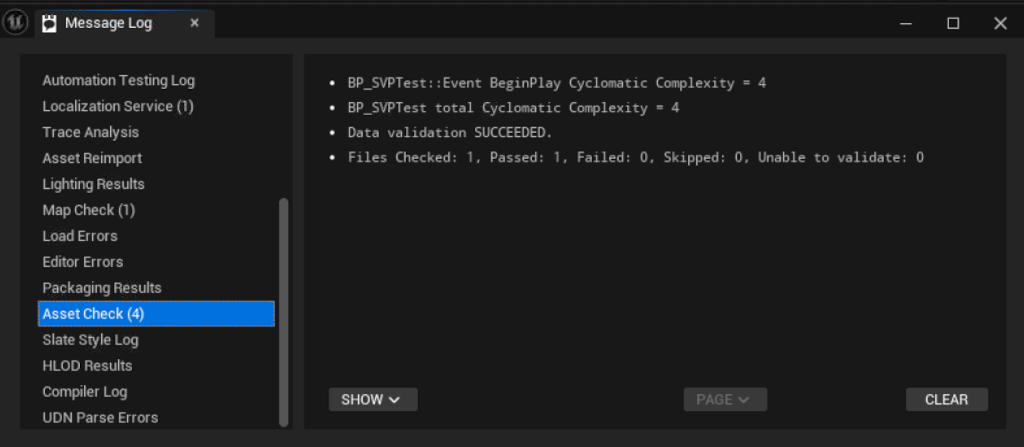
If you like to see CC for individual functions, check “Enable Verbose Logging” in Project Settings -> Plugins -> Samurai Project Validation.
This validator will be executed every time you save the BP (by default). You can disable this in Editor Preferences -> Advanced -> Data Validation -> Validate on Save.
Do you have a bonus for me?
Yes, I do!
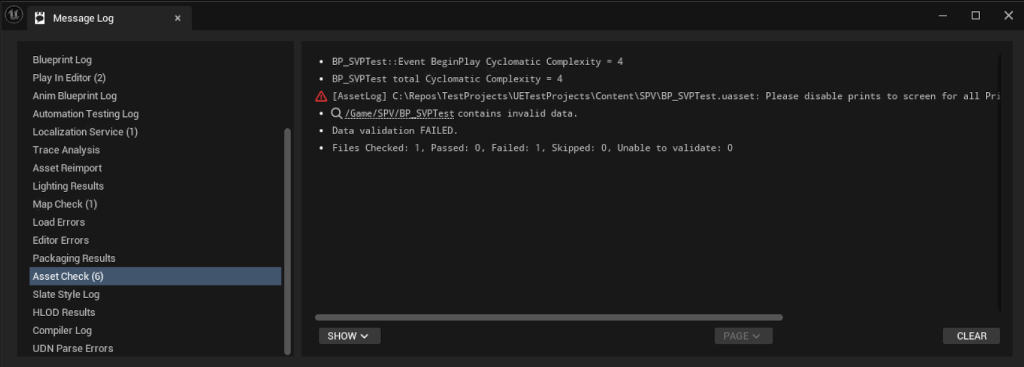
In the plugin, you can find a Print String Validator which checks whether there is any PrintString() or PrintText() function in your BP that has the “Print to Screen” enabled. If there is, you will get an error in the Message Log. No more forgotten prints that cover your gameplay!
Team leader with more than 8 years of professional experience as a programmer.

